Powering pole barns can be quite complex for people who are grid-tied. But, what if you want to convert to an off-grid lifestyle? Can solar power for barn be a viable option? The answer, fortunately, is a resounding yes – it is certainly possible to harness the power of the sun to produce the kind of energy required by your farm equipment and tools.
Not only is solar power a practical option, but it is also an economical one as it can help you reduce your monthly electrical costs. After purchasing the solar panels, the only other ongoing expense that you will have to worry about is the maintenance cost.
How Many Solar Panels Are Required For A Pole Barn?
This is a tricky question to answer, as the number of pole barns would depend upon your unique power needs. Every pole barn has different kinds and quantities of tools that need power. So, in order to answer this question, we need to first discuss the use cases of a pole barn.
Any rudimentary pole barn can be used as a simple garage or as a shed for animals or equipment – you would only need power to open/close the automated doors and to light up the pole barn. Once again, you must remember that different automated doors require different quantities of power to open and close.
So, considering the most basic setup consisting of a door and a few lights, you may need approximately 50kWh of energy every month, which translates to around 1 to 3 solar panels with an individual rating of 300 watts. To calculate the precise energy requirements for your pole barn, you should sum up the wattage ratings of the automated door and the barn’s lights.
If you plan to use your barn as a workshop, you will require extra equipment and tools like washing machines, water pumps, drills, and bench saws. This equipment will require large amounts of energy, which, of course, may also increase your barn’s power requirements.
Installing A Solar Power System For Your Pole Barn:
In order to make this project a success, it is vital to do things the right way. Here are the steps that you need to adhere to while installing solar panels for your pole barn:
1. Calculate The Needs:
Before researching solar panels or doing anything else, you should calculate the amount of power that the barn’s structure will require. This calculation needs to be as precise as possible as it will determine the quantity and rated output power of the photovoltaic panels, as well as a number of other things.
In the previous section, we talked about how you can compute the power requirements for your barn. However, you must remember that not all power-requiring elements in your barn will be functioning concurrently, which is why you need to obtain an average value.
If your pole-barn is grid-tied, you can get this average value through an energy meter. Alternatively, you can hire an expert to calculate this number and to help you figure out the number of solar panels that you will need.
2. See If The Barn Roof is Suitable For The Installation of Solar Panels:
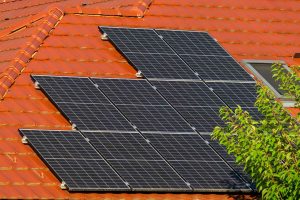
Solar panels and the installation frames are quite heavy, and you need to make sure that your roof will be able to endure this substantial additional weight. In other words, you must determine your roof’s structural integrity to make sure that you can install the required number of solar panels.
The next step is to determine the lifespan of the roof’s structure. Your roof might be strong enough to endure the solar panels now, but is it strong enough to endure this weight for the next two or three decades? Renovating the roof might force you to affect the solar panel installation, and that is not something that you want. Due to its durability, a metal pole roof is the most desirable option for solar power.
Next, you need to check if your roof gets adequate sunlight; solar panels, of course, need ample sunlight to function effectively. So, if your roof is not sufficiently sunlit throughout the day, you might need to consider an alternative installation spot (such as the ground).
Ideally, solar panels need to face southward, so you would want your roof to tick this box as well. Why south? This is because south-facing panels enjoy more sunlit hours, which will allow the solar panels to work more efficiently.
3. List Down Additional Equipment Requirements:
Using the sun’s energy to generate electricity requires a complete system, consisting of a number of components. Below are the essential tools for a solar power system:
Solar Panels: Will convert the solar energy into electricity.
Battery Bank: You will be able to use the sunlight during the day, but what if you require electrical power after it gets dark? This is where a battery bank comes into play as it can help deliver power even when the sun is not around.
Power Inverter: A battery stores DC (Direct Current) power, but not all barn equipment can be operated through DC power – some tools are likely to require AC (Alternating Current) Power. A power inverter will help you convert the DC current into AC current. If you have a power inverter, you will not need a charge controller (discussed below).
Charge Controller: Keeps track of the charge level of the battery packs while also controlling the charging current going into the batteries. A charge controller ensures optimal charging and discharging, which is crucial for maximizing the life of the batteries.
Cables: The entire system will need to be connected. Solar panels are connected in parallel, series, or a combination of the two. Once the panels are wired, they are connected to the controller and then to the battery. You will also need cables to connect the inverter and the battery.
Other: You will need circuit breakers and switches to keep the system safe. Incorrect installation can make a solar panel extremely dangerous.
4. Purchasing:
Now that you are clear about the power and component requirements, it is now time to get down to the buying process.
Start by picking a reputed seller who only deals in authentic products. In most cases, a single supplier can provide you with everything that you need, but you must be careful and cautious as duping is, unfortunately, far from rare.
We understand the temptation to save as much money as possible, but do not compromise on quality. If you have to pay a premium to get the best products, do not hesitate – like we mentioned, it is a one-time investment, and one that will fetch you returns for the next 25 to 30 years.
Established manufacturers and suppliers offer product warranties and we recommend buying from such a seller. This way, you can get any future concerns or problems addressed without having to pay more money.
5. Installation:
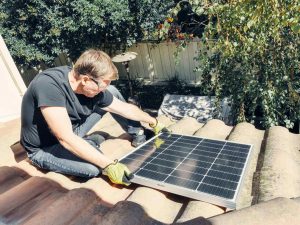
Once you have returned from the market, the next step is to unpack and start installing the system. If you are not confident enough about DIY installation, reach out to a technician.
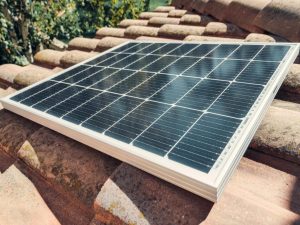
The solar panels will be connected to the base rails and tied to the roof frame. If you have decided to install the panels on the ground, the ground is where you need to hook the base.
So, the three main stages of installation are:
- Getting the site ready
- Bolting the base
- Attaching the panels onto the rails
It is best to wire the system at the time of installation; doing the wiring later could prove to be more complex and dangerous.
6. Connecting The Equipment:
The next step is to connect the devices, power inverters, charge controllers, and the batteries to the solar panels. Make sure to use the recommended circuit breakers, switches, and wire gauges. Remember that a solar system’s equipment requires lower voltage ratings than a grid system.
If the system has been connected correctly, you should be able to derive your required level of energy.
7. Testing The System Out:
At this point, you are likely eager to get your system up and running. However, before you switch on the power-requiring devices, you need to test the system.
A simple way to test the solar power system is by calculating the power input to power output ratio. This ratio will help you determine the efficiency and, by extension, the performance of the system.
8. Completing The Installation Process:
Solar power systems have a lifespan ranging from 20 to 30 years. This means that you can enjoy free energy for the next two to three decades while spending a minimal amount on system maintenance.
Once the installation is complete, reassess the system to make sure that nothing is amiss. Once this is done, wire every device that will use solar energy and keep track of all these devices.
Final Word:
To sum up, a solar power system can provide clean, reliable, and pollution-free energy for your barn. Using the steps discussed in this guide, you can install a solar power system and benefit from electricity cost savings while simultaneously helping the world that you live and breathe in.
If you are interested in calculating the efficiency and performance of your solar power system, please feel free to check out our Off Grid Solar Calculator. This tool provides information regarding PV system performance and solar radiation for any location throughout Europe and Africa, as well as for large parts of Asia and America.


